
Imagine if you could mold and modify your main app codebase into distinct variations without altering its essence. That’s precisely where “Flutter flavors” come into play.
Whether you’re tailoring your Flutter app for different environments, creating demo versions, or rebranding entirely, understanding how to utilize flavors effectively can significantly optimize your development process. In this guide, we’ll dive deep into Flutter flavors, why they’re indispensable, and how you can implement them for Android and iOS.
What are flavors in Flutter?
Let’s use a culinary analogy to understand the concept of flavors in Flutter.
Imagine you’re in a kitchen, preparing a meal with chicken as the primary ingredient. Chicken, a versatile protein, can be the foundation for many dishes, each offering a unique taste and presentation. Similarly, in the Flutter project, the main codebase is analogous to our chicken. It’s the fundamental part of our Flutter application, but how we serve or present it can vary depending on our needs.
Chicken can be prepared in various ways or various flavors, for example:
- Sauté,
- Breaded,
- Boiled,
- Sweet & Chilli,
- Curry.
By defining different flavors in Flutter, developers can use the same foundational codebase (our chicken) and modify configurations, settings, and features (our ingredients and cooking methods) to produce distinct versions of the application.
Why should you use flavors in your Flutter app?
Flavors are a technique to create various application variants using a single codebase. It allows us to define custom arguments and parameters during compilation time, which affects how the application behaves.
During mobile app development, we often want to work in different environments. To do so, Flavors come in handy.
While developing new features, especially in large production apps, we’d instead use our development environment not to interfere with existing production users or to avoid application downtime.
Using flavors to build applications with specific environments is also helpful during bug fixing, where QA engineers can set up the application in one particular way to reproduce production issues that have been reported. In contrast, in a production environment, it could be very hard or even impossible to make it in a way that does not impact the users.
This is just one use case of flavors. Using this technique, we can also differentiate our application.
Flavors will also be helpful to create:
- Free demo version of the paid application;
- Another, basically the same application with another branding;
- When it is the same application but with a different name or icon.
How do you set up flavors in the Flutter for iOS?
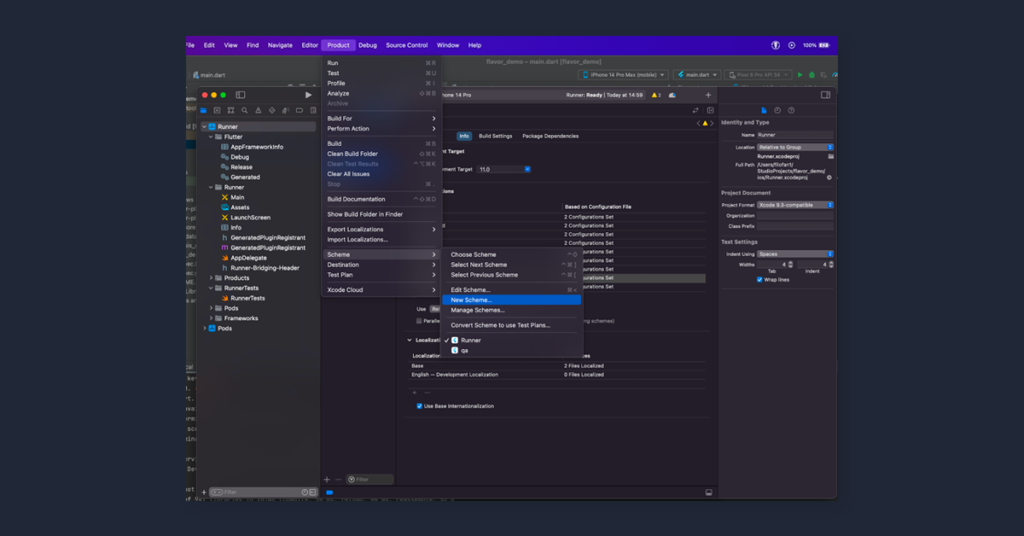
1. First, we need to create new product schemes in XCode. In our example, it is prod and qa.
In XCode, select Product -> Scheme -> New scheme.
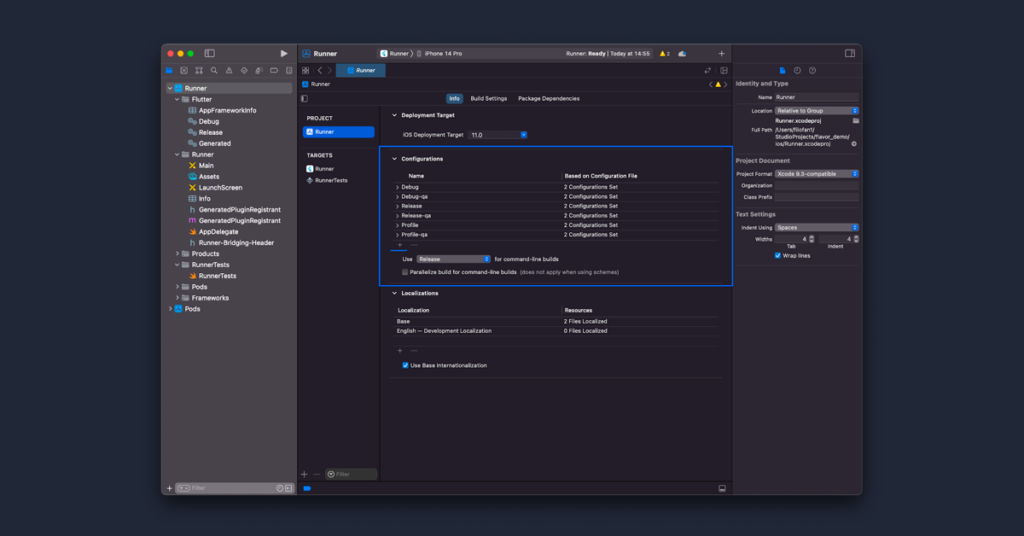
2. Once schemes are created, we have to duplicate build configurations:
Debug, Release, and Profile once per the scheme, with the copied build configuration name + prefix as a name.
As a prefix, use the current scheme name.
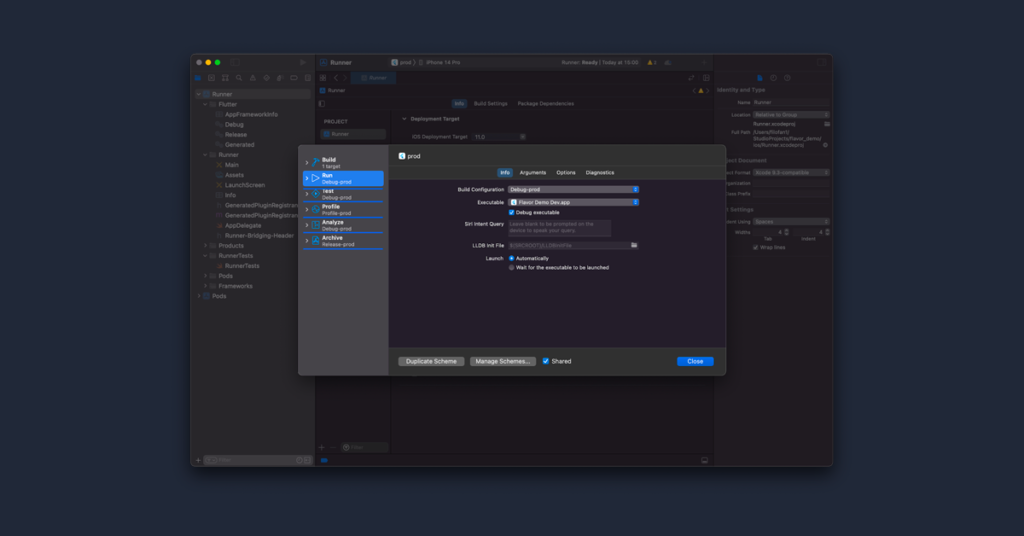
3. Now, we need to update our previously created schemes with the correct build configuration.
In XCode, select Product -> Scheme -> Manage schemes
At this point, the basic configuration is ready, and we can start differentiating our application, for example:
- Set application name
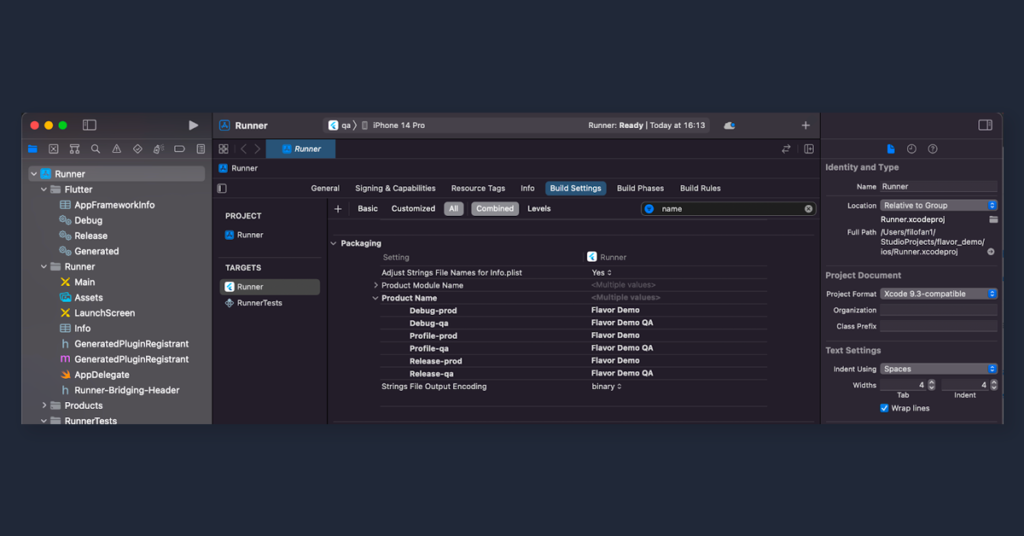
- Set different bundle id

How do you set up flavors in the Flutter for Android?
In the case of Android, setup is a bit simpler because we don’t have to deal with the XCode.
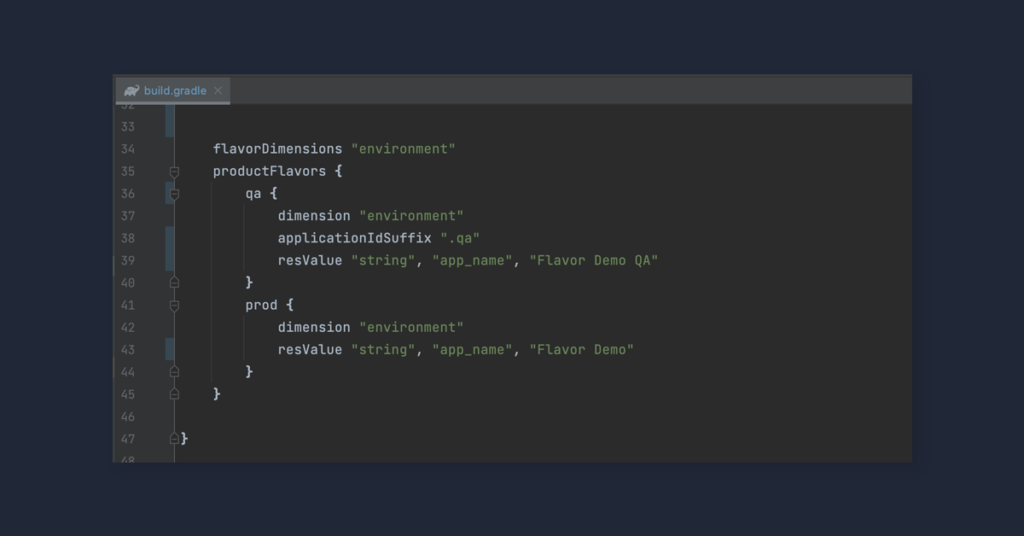
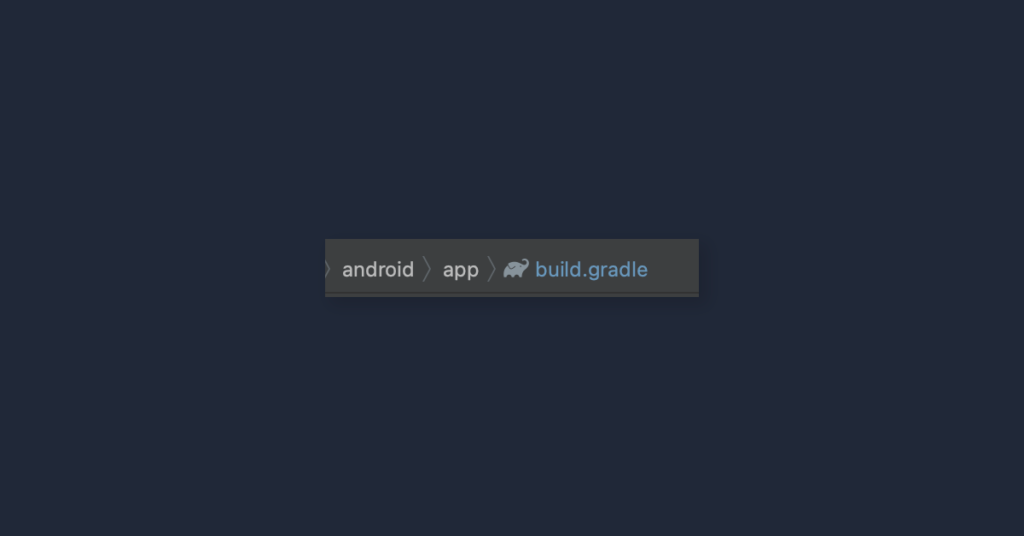
- First, find your build.gradle file (make sure its app build.gradle)
- In build.gradle add flavor configuration.
We can set a bunch of options like applicationId, applicationIdSuffix, resource values like app name, custom strings with api host, etc.

This is just a basic Flavors configuration. You can read more on
How do you run Flutter flavor in Android Studio?
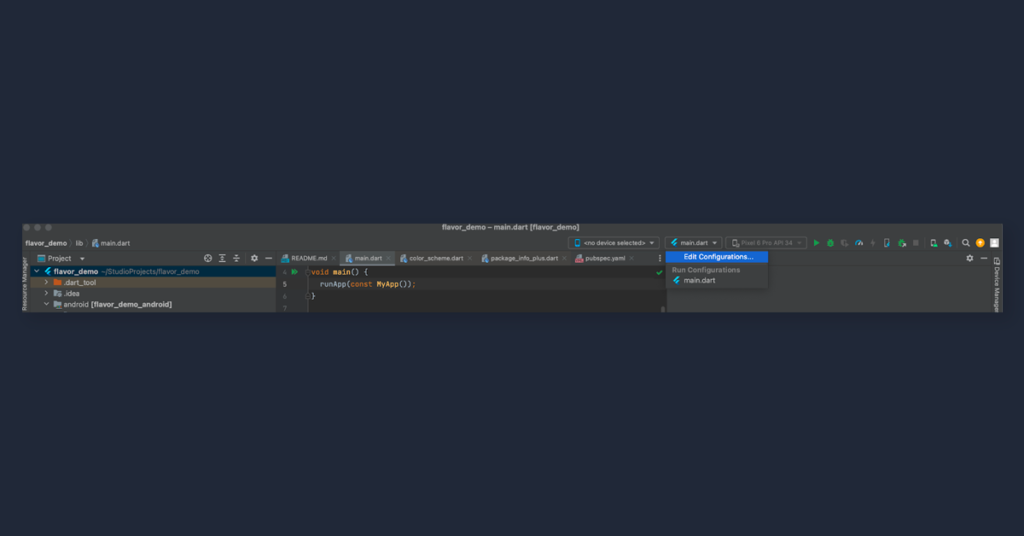
Once we have our flavors set up, we need to prepare our IDE.
- Find “Edit configurations”.
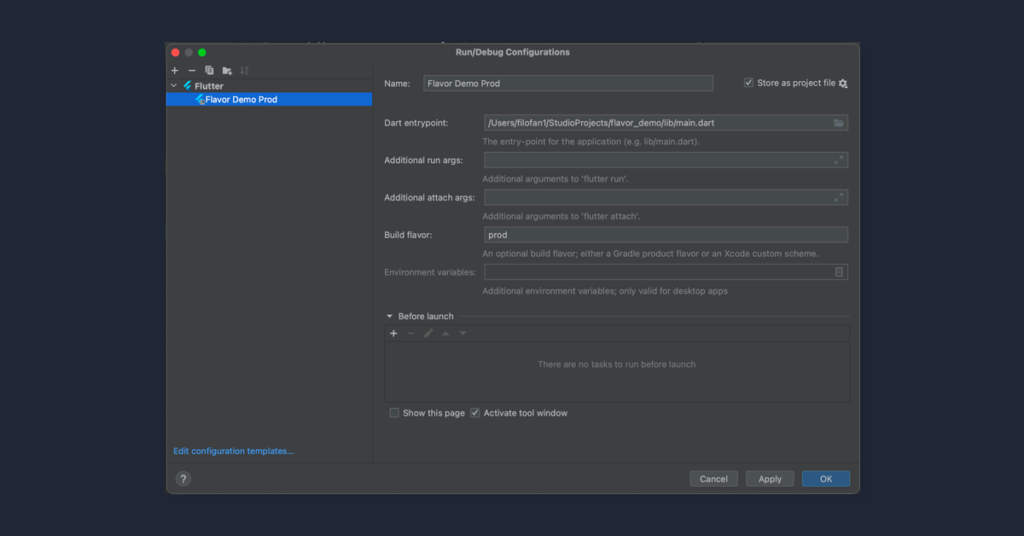
- Add a new configuration and set its name.
- In the field Build flavor, put the correct flavor name.
How do you run Flutter flavor in VSCode?
In the project root, create a .vscode directory and generate a launch.json file in it.
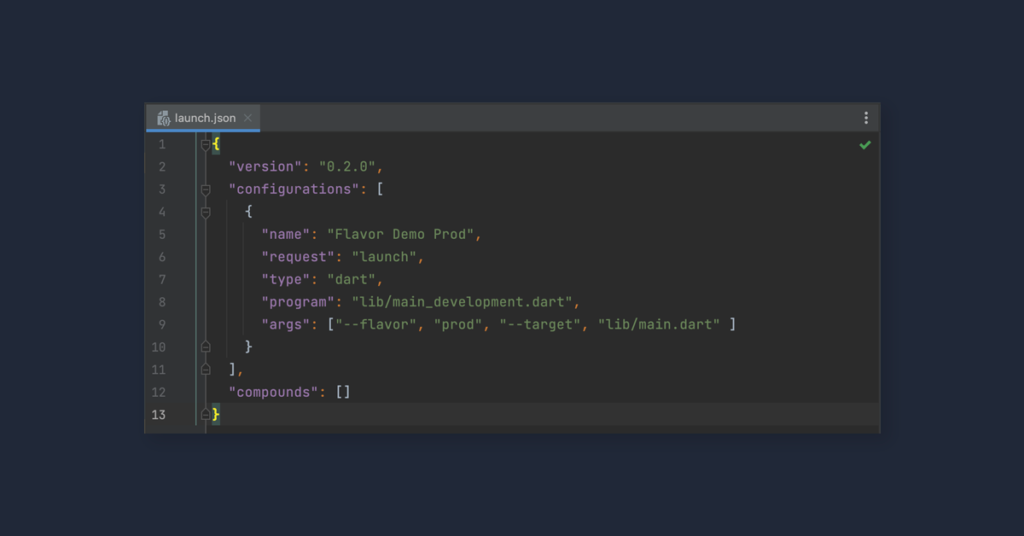
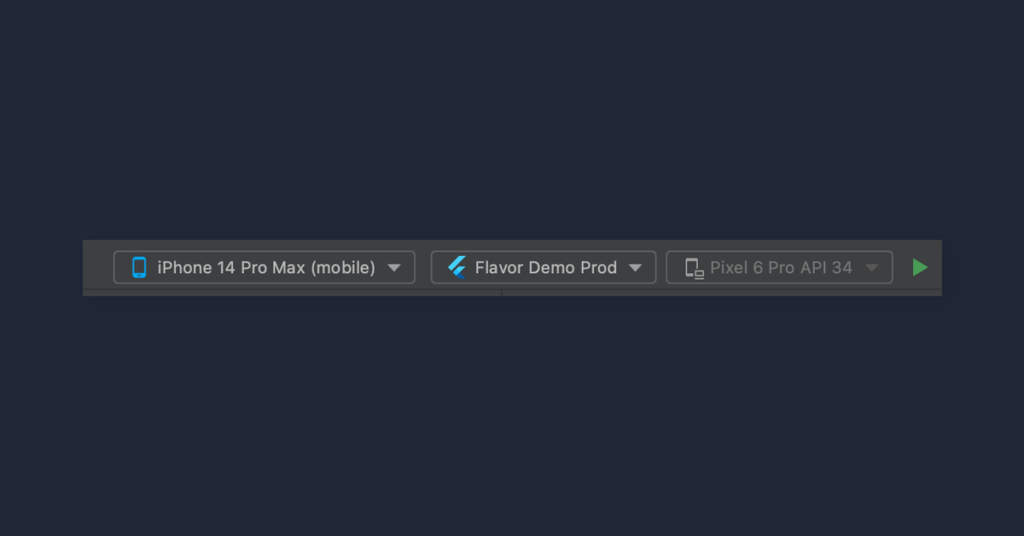
Now, we can launch our application with the newly created Flavor.
or build it from the command line:
flutter build appbundle –flavor prod
Contact
Do you want to find out more about Flutter app development?

Mastering Flutter application variants with flavors
The power of Flutter flavors truly lies in its ability to streamline and diversify mobile app development. With flavors, we can effortlessly serve our application in various ‘tastes’ while maintaining a single core codebase. This not only simplifies the development process but also ensures efficient bug tracking, seamless environment switching, and personalized application branding. So, the next time you’re in the development ‘kitchen,’ remember to spice things up with some flavors and watch your app evolve in ways you never imagined!


